I thought I would share with you this tutorial on making cake pops!! I have been a bit obsessed with them for some time now & this was my first attempt at making them ....
We have our youngest daughter's 1st birthday coming up in 3 weeks - so I am planning on freezing some & then having them ready to use for her party (that way I can see how they turn out and then use them as wedding favours & will be able to make them a couple of weeks in advance!)
What you need:
Cake (I just made a regular chocolate cake)
Frosting (you can eith use bought stuff or make it yourself - I made up about 1/2 a cup)
Lolly pop/ice cream sticks (I only had icecream sticks so thats what I used)
Chocolate (I used approx 350 grams)
A block of polystyrofoam (I put some aside a few weeks ago that was in a packaging box)
Cling wrap (to go over the block)
STEP 1 :
You will need some cake - I made a double batch of chocolate cake today - I only used one of the cakes though (will probably make the rest tomorrow)
STEP 2:
Once the cake has cooled down you can either crumble the whole thing up using your hands or do what I did & just throw it all in a mixer
You want to aim for the consistency in the photo below - you dont want too many big chunks in it or they will fall apart at the end ...
STEP 3:
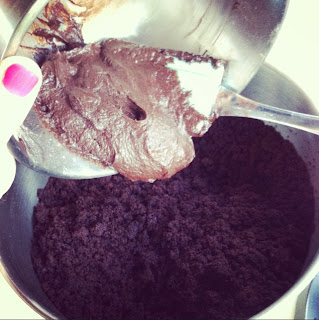
Next step is to add the frosting (again you can do this in a mixer but you will have to end up using your hands) to get it properly mixed through)
I made frosting (about half a cup - but you can use more, you really dont need much) - you can always buy the pre-made stuff from the supermarket (ie. Betty Crocker frosting)
So I firstly made the frosting (as in the photo below - just so you can visualise how much I used)
Then add it to the cake mixture ....
Mix it together really well
STEP 4:
Using clean hands (obviously) roll even sized balls - I ended up with about 22 in the end.
Put them in the fridge for a few minutes while you set up for the next step.
STEP 5:
Melt a small amount of chocolate in the microwave (do it in 30 second intervals and stir through really well each time)
Once it is melted take the cake balls out of the fridge and get your sticks ready.
I think lolly pop sticks look better - but I only had icecream sticks
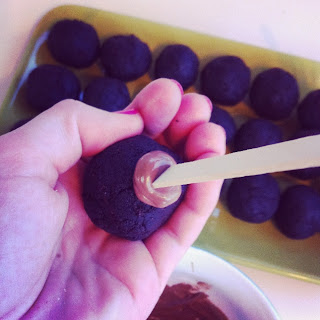
Carefully doing one at a time - take a ball, then a stick - dip the stick into the melted chocolate then carefully stick it into the ball (carefull not to poke it all the way through)
You will then need to put them all back in the fridge to set while you get ready for the next step ...
STEP 6:
- You will now have to cover your polystyrofoam block in a couple of layers of cling wrap & set it aside.
- Also melt the remaining chocolate (again at 30 second intervals) in a bowl thats big enough to dip the cake pops into.
- Take the cake pops out of the fridge once they are set and you are ready to cover them in chocolate!!
Carefully submerge each cake pop into the chocolate & either tap on the side of the bowl or carefully smooth out with a knife.
Once you are sure the chocolate is not going to run down the stick put it in the foam block (you may need to keep an eye on drips and neaten them up a little with your knife!)
STEP 8 (optional):
Decorating!!!
I piped white & dark chocolate stripes onto mine - but you can just drizzle the chocolate over the top or do other patterns!!
I am not completely happy with mine because they look pretty rough - but they are not too bad for a first go!!

Feel free to ask me any questions - and let me know how you go!!
:) x


